
Home:
Grafting Tips:
TAMU Grafting:
Fruit Trees:
Citrus Trees:
Around the
yard:
Useful stuff:
Our Edible Landscaping:
Talbert Farms:
18,000 visitors since the beginning
Visitors since 20Feb05

Home Fruit Production-T-Budding Citrus
Julian W. Sauls, Ph.D.
Professor and Extension Horticulturist
Texas Cooperative Extension
August 1, 2001
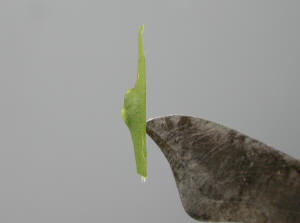
Cutting the bud
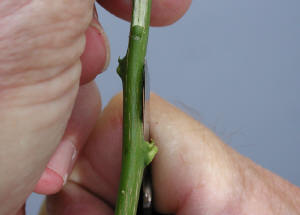
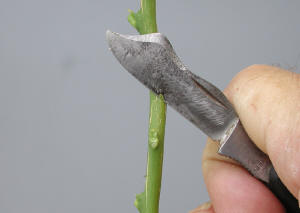
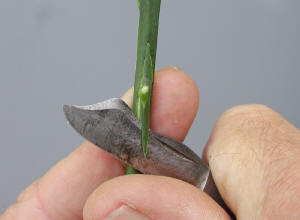
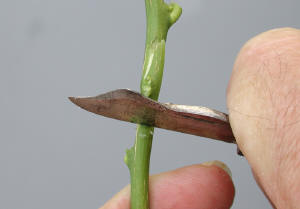
The most critical aspect of budding is cutting the bud itself--it is only a very thin slice of bark and a sliver of wood beneath the bud, but it must be cut evenly and smoothly. The flat side of the blade must be flat against the budstick (Image10), with the knife held at about a 45 degree angle to the budstick (Image 11). With the thumb braced along the stick below the bud, simply draw the knife towards the thumb (again, no sawing or rocking motion!), keeping the blade flat against the stick to prevent it from cutting too deeply (Image 12). If the blade remains flat against the stick, it will normally slice under the bud and exit below it (Image 13).
|
10. Side view of start of bud cutting. |
11. Start of bud cutting. |
|
12. Middle of bud cutting. |
13. Finish of bud cutting. |

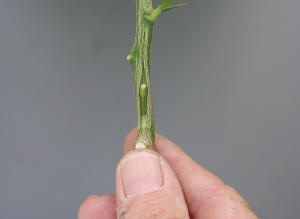
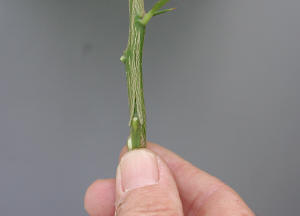
Inserting the bud
Place the upper end of the bud piece beneath the bark flaps at the bottom of the inverted T and gently but firmly push it upward with your thumb (Image 16). With a good stock and slipping bark, the bud will easily slide under the bark, lifting it from the wood as the bud is pushed upward. Slide it upward until the entire bud piece is beneath the bark of the stock (Image 17). Note that the sides of the bud piece are completely beneath the bark on both sides of the vertical part of the T, with the actual bud about centered between the two cut edges of bark.
|
14. Bud cutoff, if necessary. |
15. Completed bud ready to insert. |
|
16. Start of bud insertion. |
17. Complete bud insertion. |
BuddingPg3.html